So you’ve taken a picture, and whether it was spontaneously or a whole production, at first glance, on screen, it looked perfect… but when it came time to upload it to your blog/instagram/online shop or even personal album, you discovered that there’s something about the photo you didn’t notice earlier but completely ruins your photo.
That’s it, the moment's over.
So now you’re stuck with a picture which, on the one hand, you don’t want to lose and don’t have another opportunity to reshoot, and on the other hand, its mediocrity is so upsetting since it had great potential!
Say no more – you’ll be happy to discover how many photos can be salvaged with a little proper editing help by the treasure box otherwise known as Lightroom 😍
In this post I am about to share the ways I use Lightroom to save my picture from four especially annoying things – 1) photos that come out crooked 2) photos in which the sky looks white and lacks detail 3) photos that show acne, wrinkles, and bags under your eyes, and 4) photos that include objects you wish wouldn’t appear in them.
Let’s begin! 🧚♀️✨
Dealing with Crooked Photos
We often only notice a picture is crooked much after we take it, when we have another look at it on screen, when we might notice the composition isn’t perfect. We can’t always fix all the mishaps that took place when the photo was taken, but in certain cases much can be done during the editing process to save our images.
So how can Lightroom save the day?
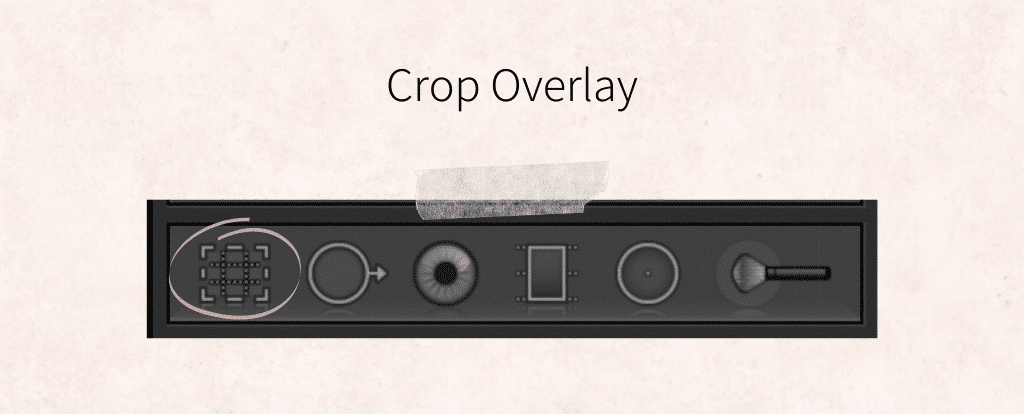
Lightroom has a very basic, yet powerful tool named crop overlay, with which you can straighterm, crop, and rotate your photos to help make them appear professional instead of amateur.
To “save” any pictures that turned out a little bit {or a lot 😅} crooked you can use the following three tools:
1. Use the software to automatically calculate the right angle for the picture, by clicking auto {doesn’t always work, but worth a shot}.
2. Rotate the image using the “rotate” tool until you reach a result you’re happy with.
3. Using a tool called “straighten”, you can actually show Lightroom how to straighten the photo.
Dealing with White Skies
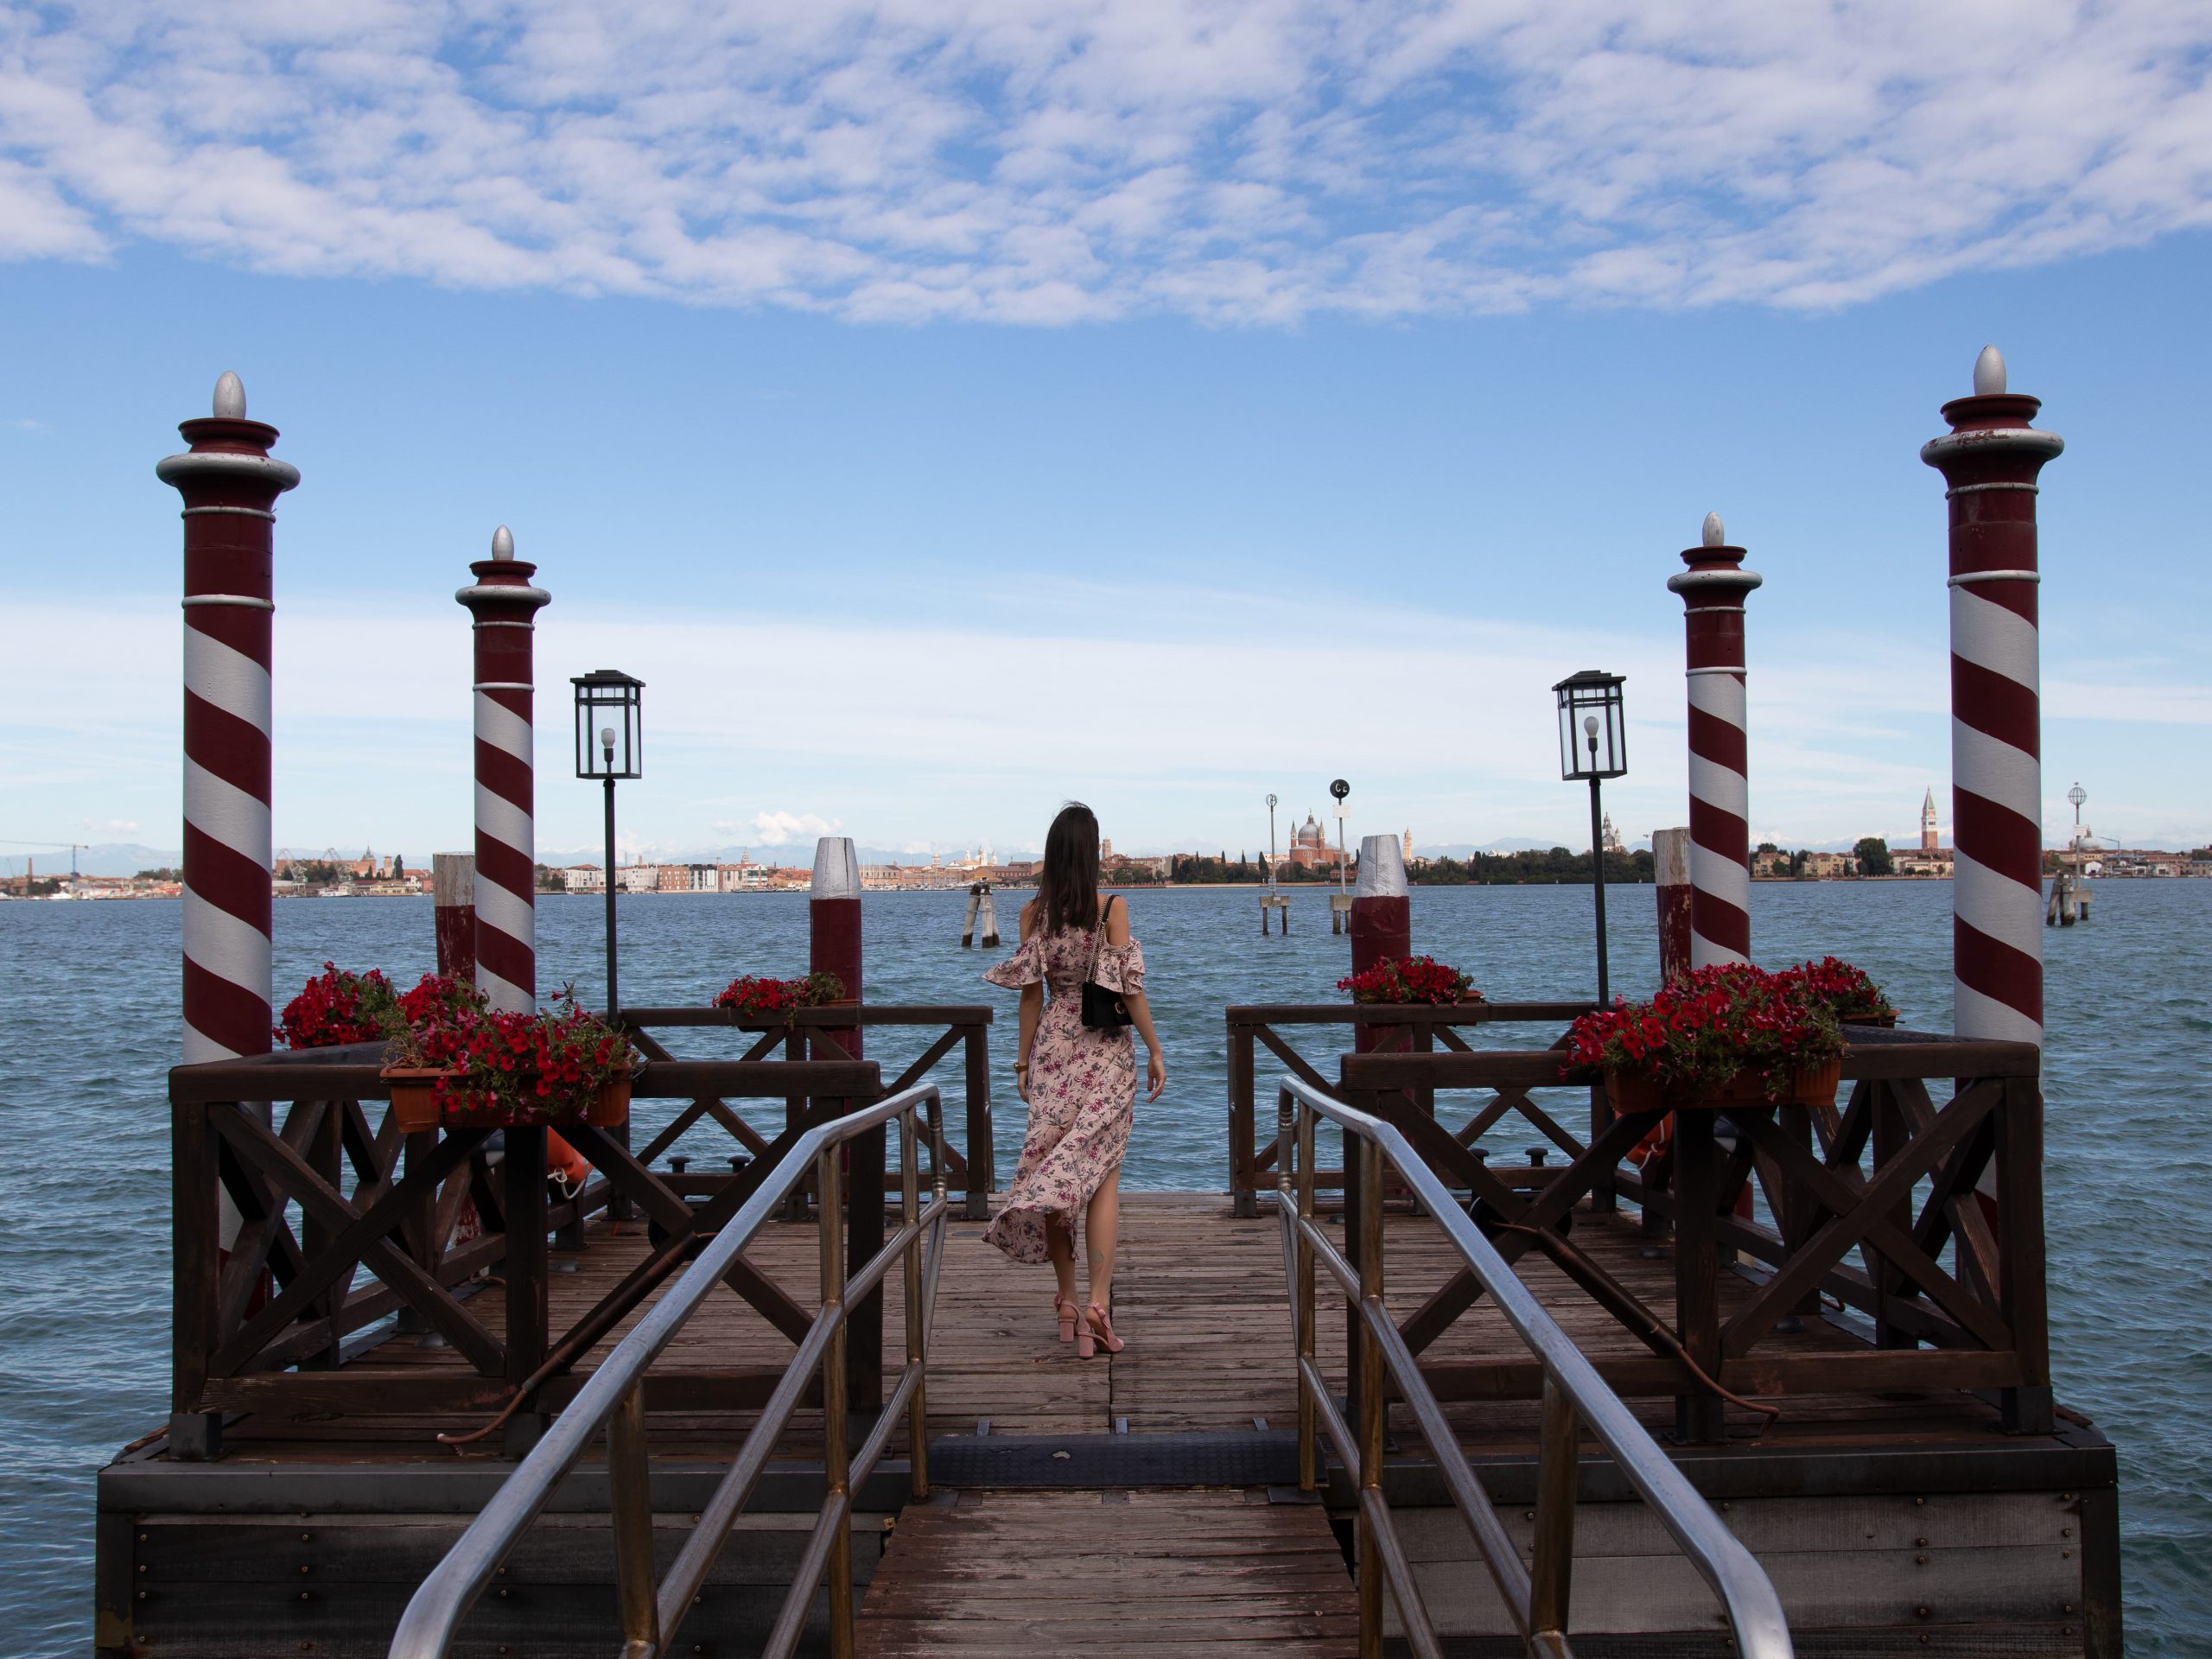
You know that feeling when you take a gorgeous photo – the location is perfect, the outfit as well, and all of the components came out exactly as you wanted them to, except…. The blue skies came out pale white and lacked any detail {which, by the way, is not relevant only to fashion photographs, but also to visuals of travel and landscape, architecture, and products}.
I used to get really upset whenever something like this would happen. A, because I didn’t understand why certain parts of an image appear brighter or darker than others, and B, I didn’t know how to properly edit and fix the photo.
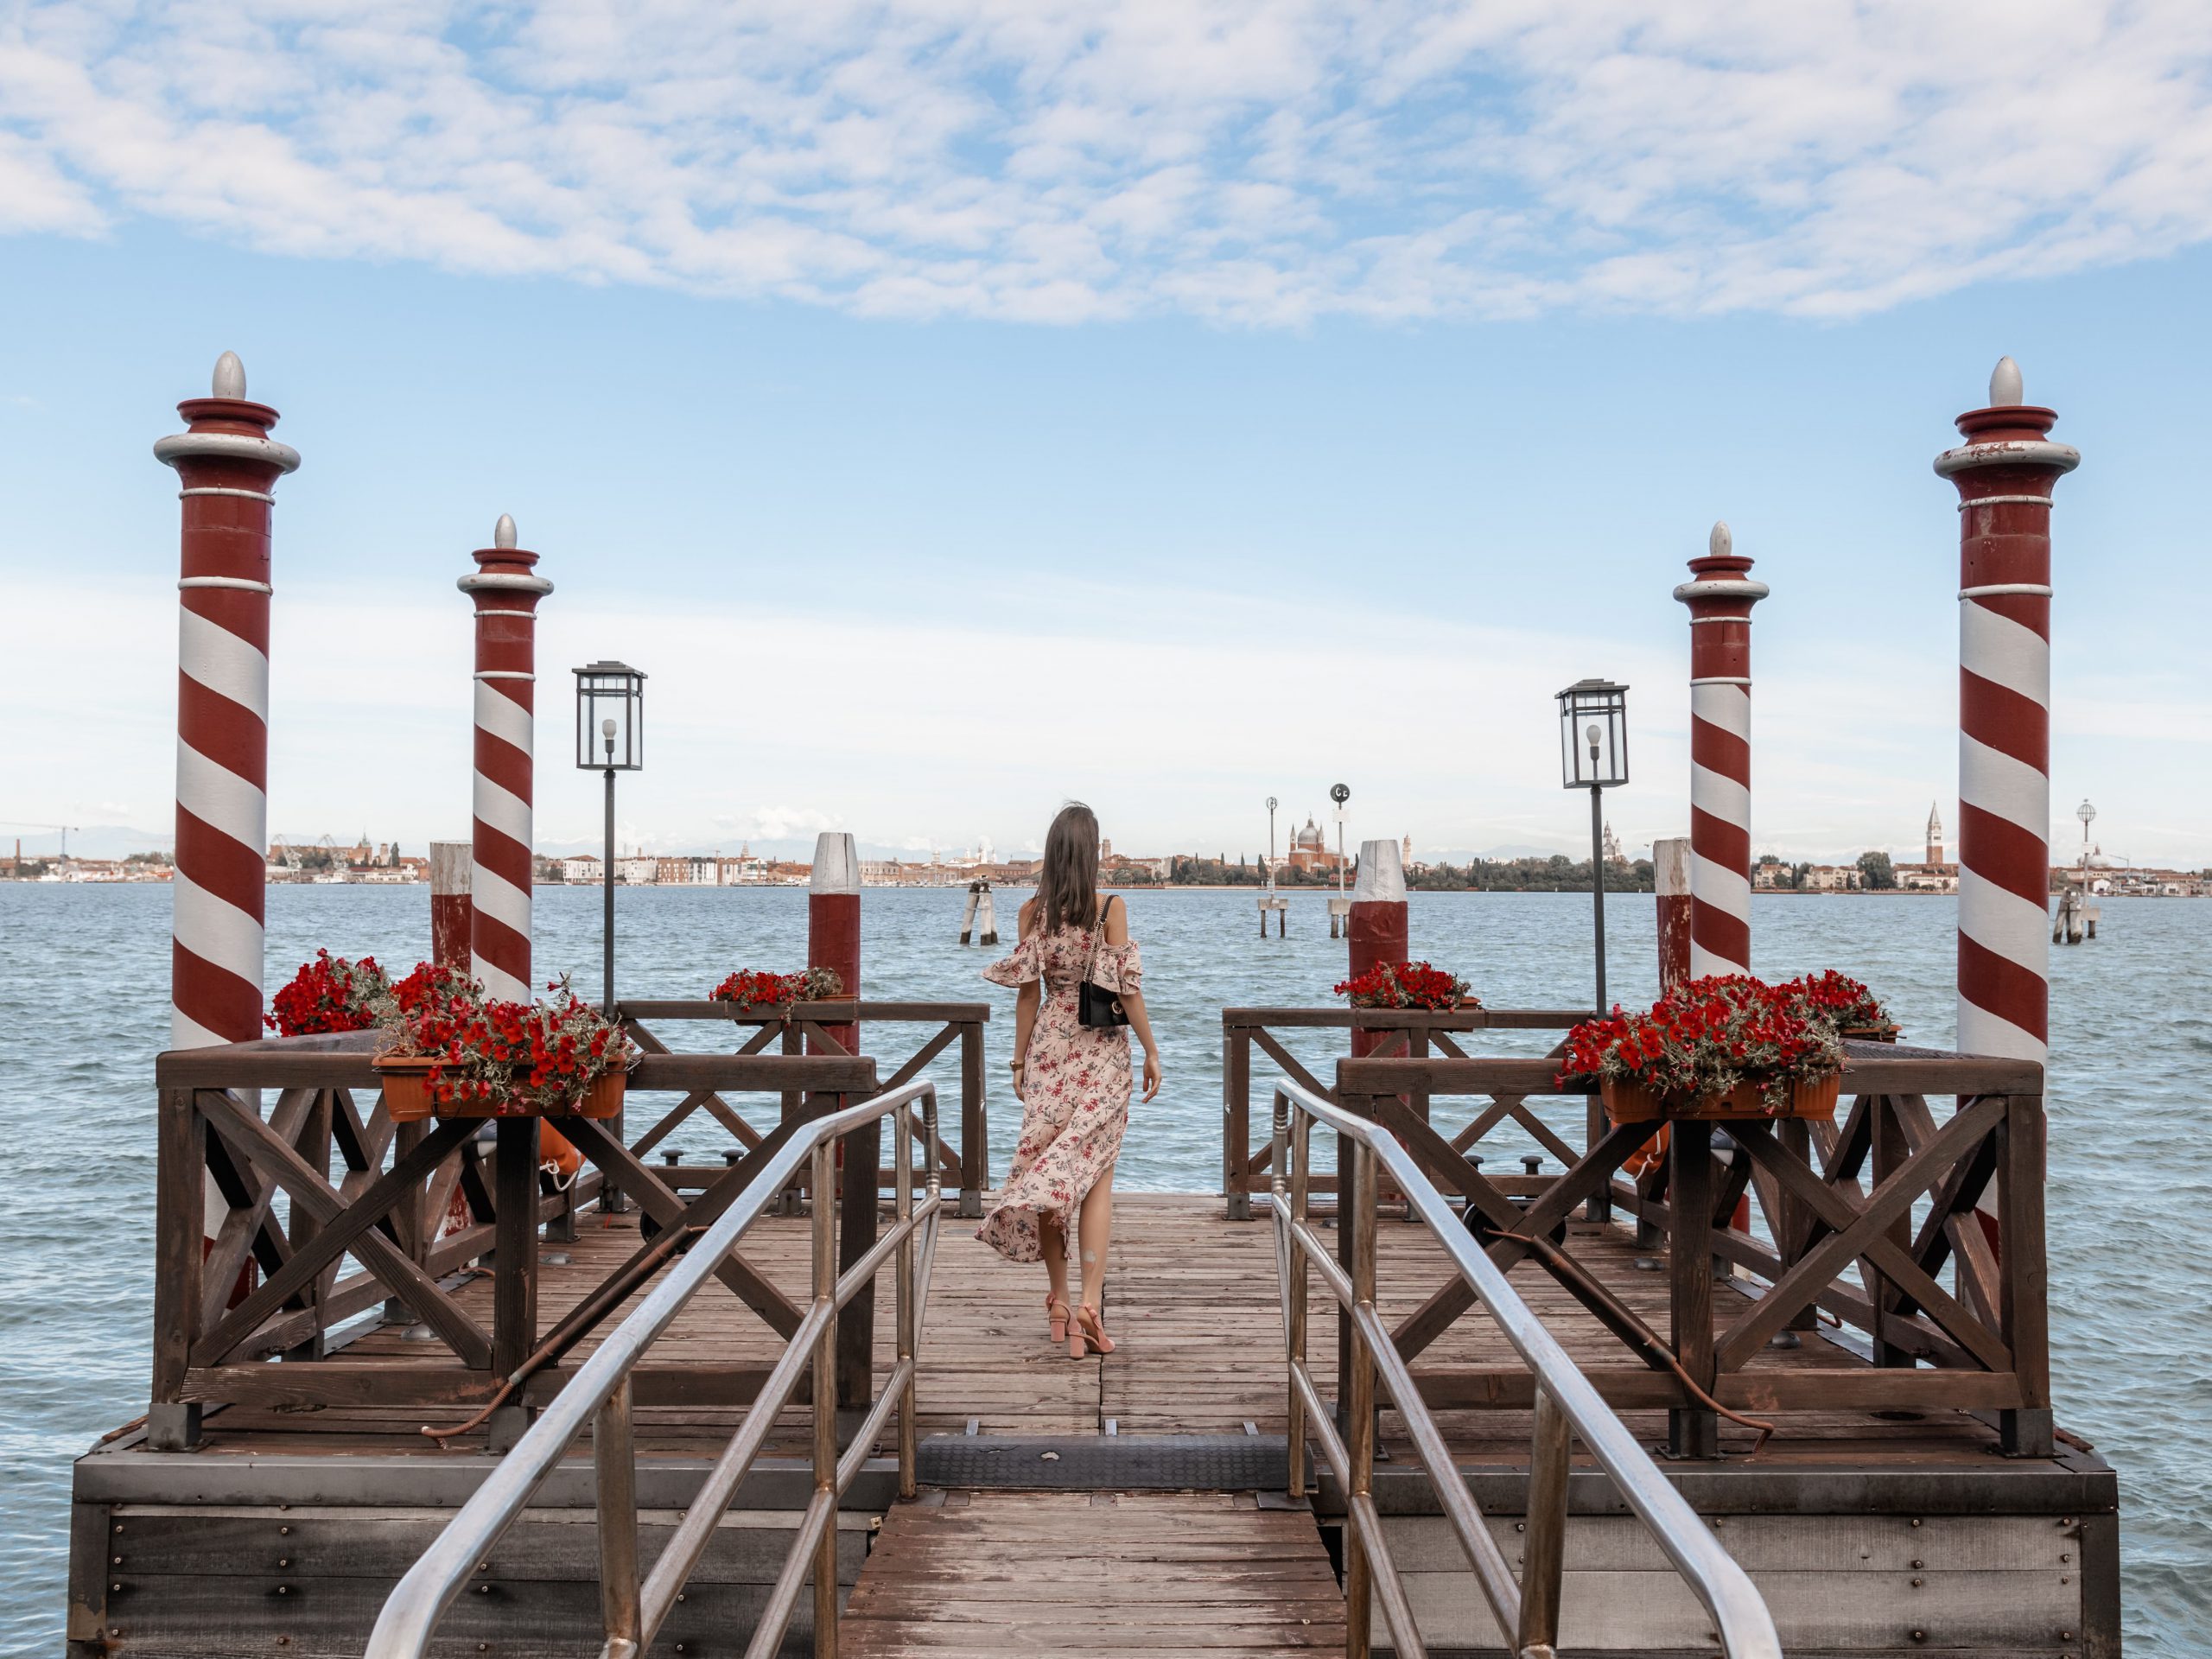
With time, I learned how a camera works, and also how to “save” an overexposed sky using Lightroom. Today, I manage to overcome the unbalanced exposure issue {too bright or too dark} right at the time of photography, and in other cases {where the unbalanced exposure is a problem that can't be solved immediately at the time of photography}, I know I can count on LIghtroom.
So how does Lightroom actually help?
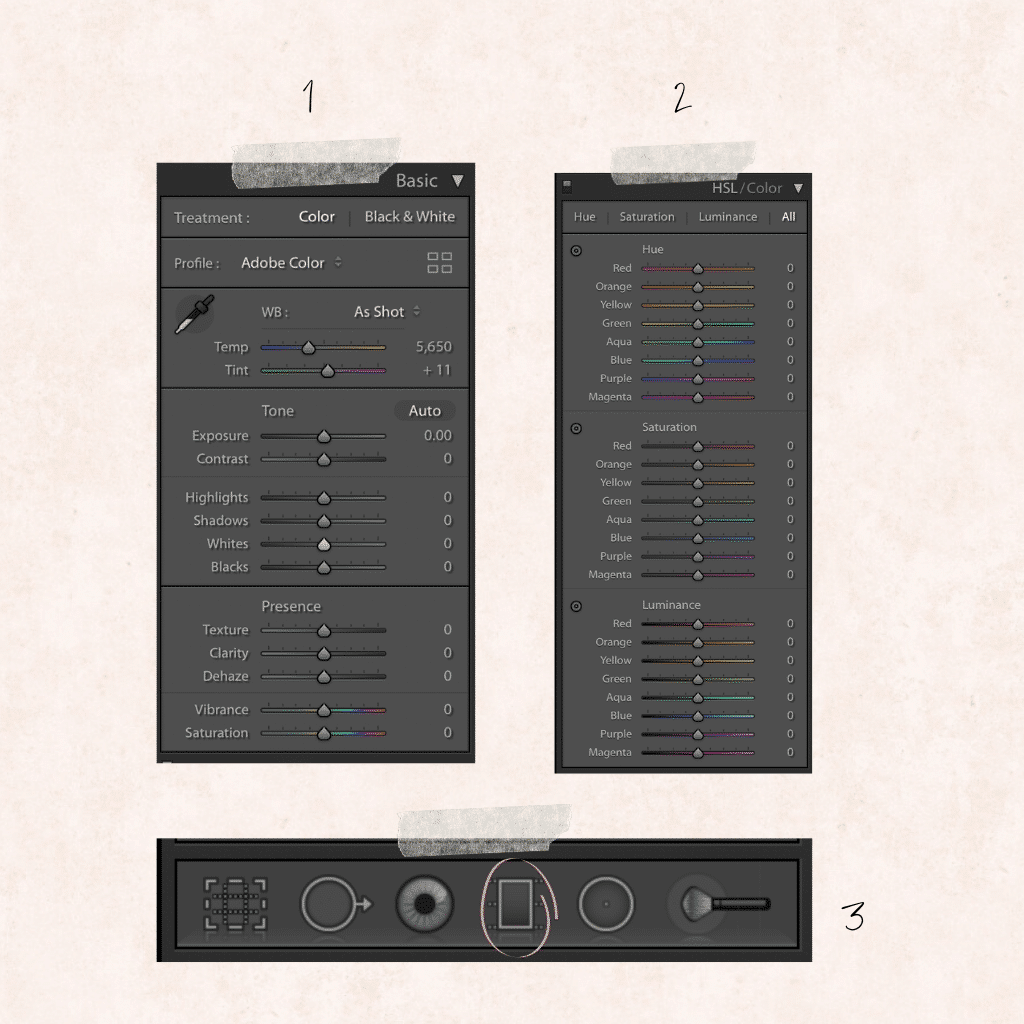
1. The basic editing panel – I move all of my whites and highlights sliders to the right, these affect the white and light parts in an image. It is crucial to know that the editing with the basic Lightroom panel has a broad effect on the image, {meaning, the editing affects the entire photo}, you want to cautiously move around the sliders so as not to ruin any other parts while you're trying to change the sky 😉
2. Color editing panel – With this panel I can focus on the blue hues in the photograph. I darken the blues with the luminance slider and strengthen the blues color with saturation. Do note that in this case too, editing the blues will have an effect on the blue hues in the entire photo and not just on the sky, so it’s important to look at “the big picture” when playing around with the different sliders.
3. Local editing – I saved the best for last! 🤗 Using local editing tools, specifically the graduated filter, you can select the sky’s area and edit it specifically, without touching the rest of the image. I recommend using this tool as your last step, after you do the initial editing in a gentle and informed way with the help of the two panels mentioned above.
P.S. Interested in learning more about photography and professional photo editing? The blogger’s Photobooth is a a photography and editing course where I teach and guide you through my entire process of creating eye-catching visual content. If you want to get more details click here ❤
Removing Acne, Wrinkles and Bags Under the Eyes
Lightroom is best known as a software used by professional photographers to edit the color and lighting of their work, while Photoshop is known more as a platform for editing more complex elements such as removing acne, wrinkles, and bags under your eyes. True, photoshop can do all this {and more!} but you might be surprised to know that you can use similar tools on Lightroom and reach similar results.
So how does Lightroom save the day?
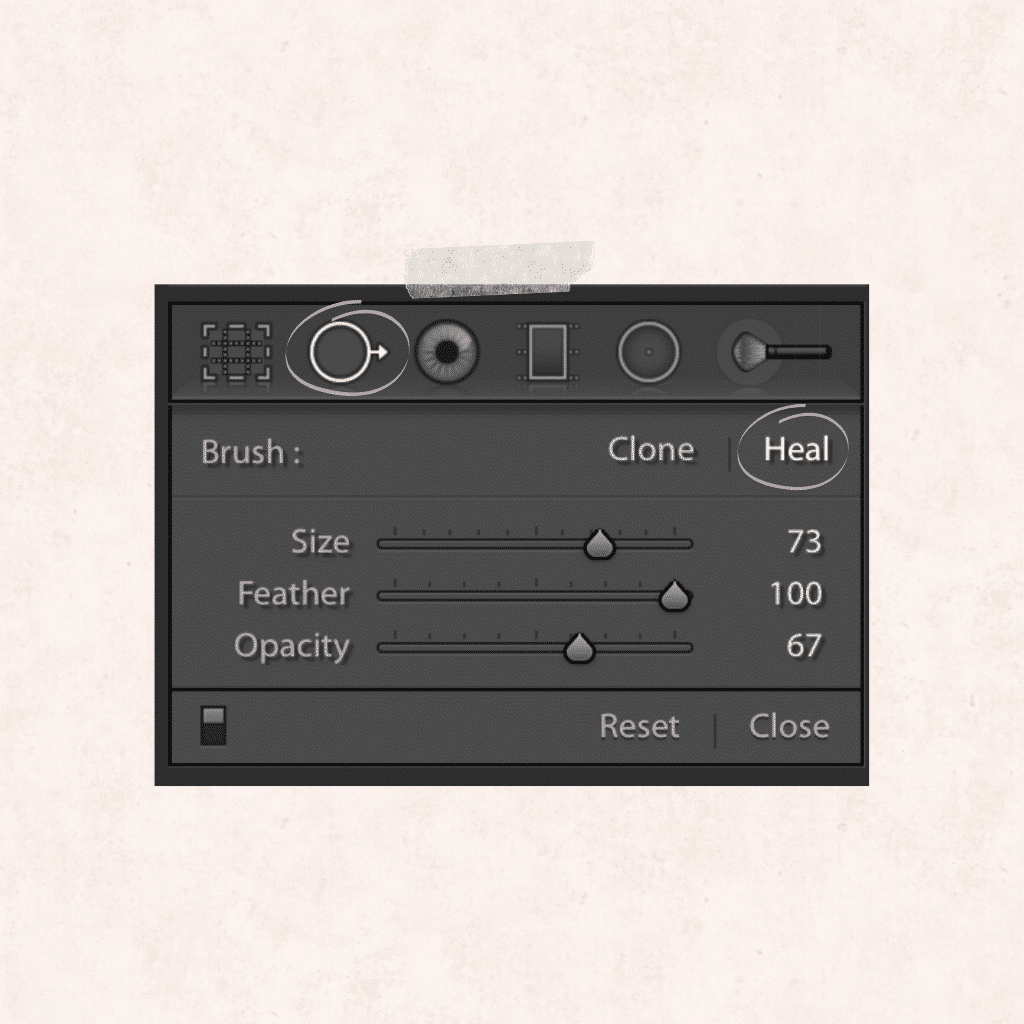
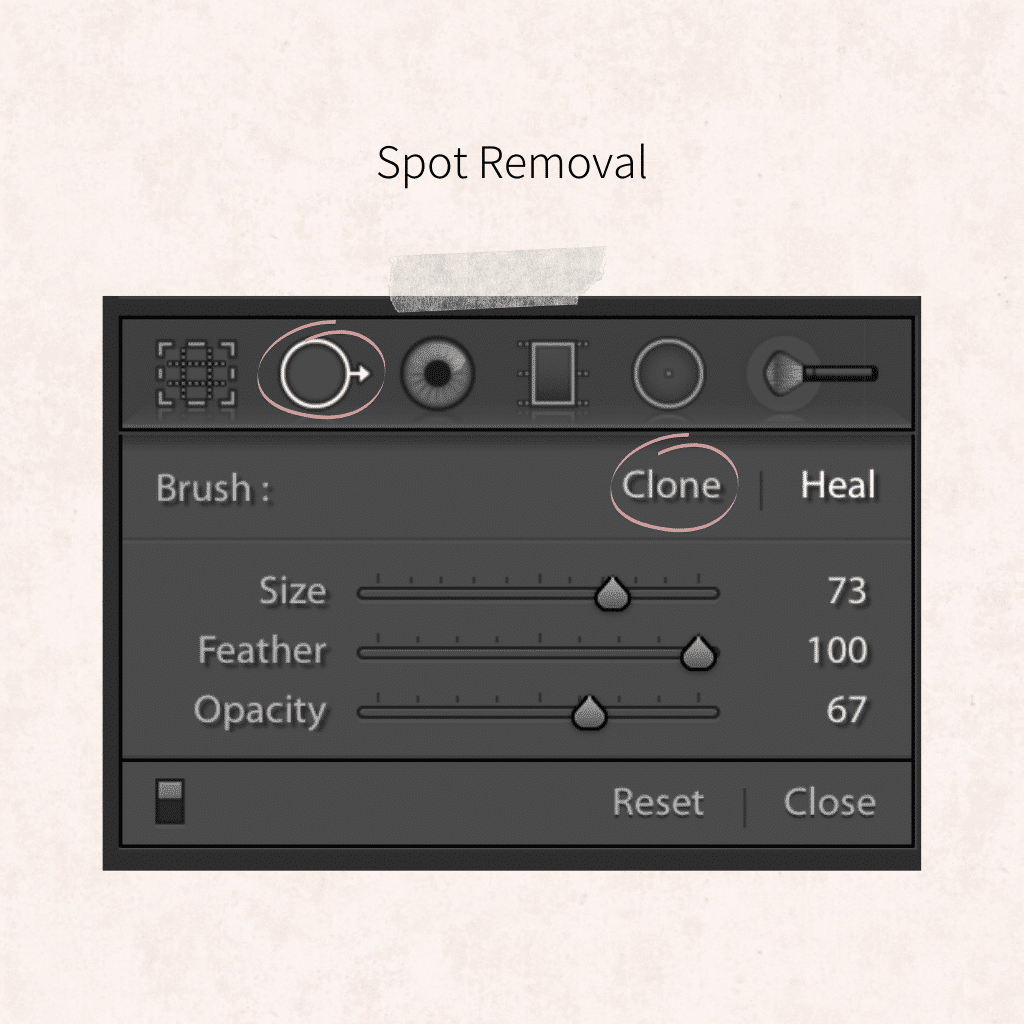
Lightroom has a small, almost hidden tool – which is very effective – although most people don’t even know it exists – a tool for stain removal you can use to blur or erase almost anything in the photo. This tool comes with two brushes – heal and clone – while the two are designed a tad different than one another so that they can match your needs. I like to stick to a clean, fresh look which is why I prefer using the heal brush to blur problematic areas. The clone brush actually replicates a selected sample area. Beyond that, similar to Photoshop, Lightroom also easily creates a look with smoother skin by using various editing sliders in the basic editing panel.
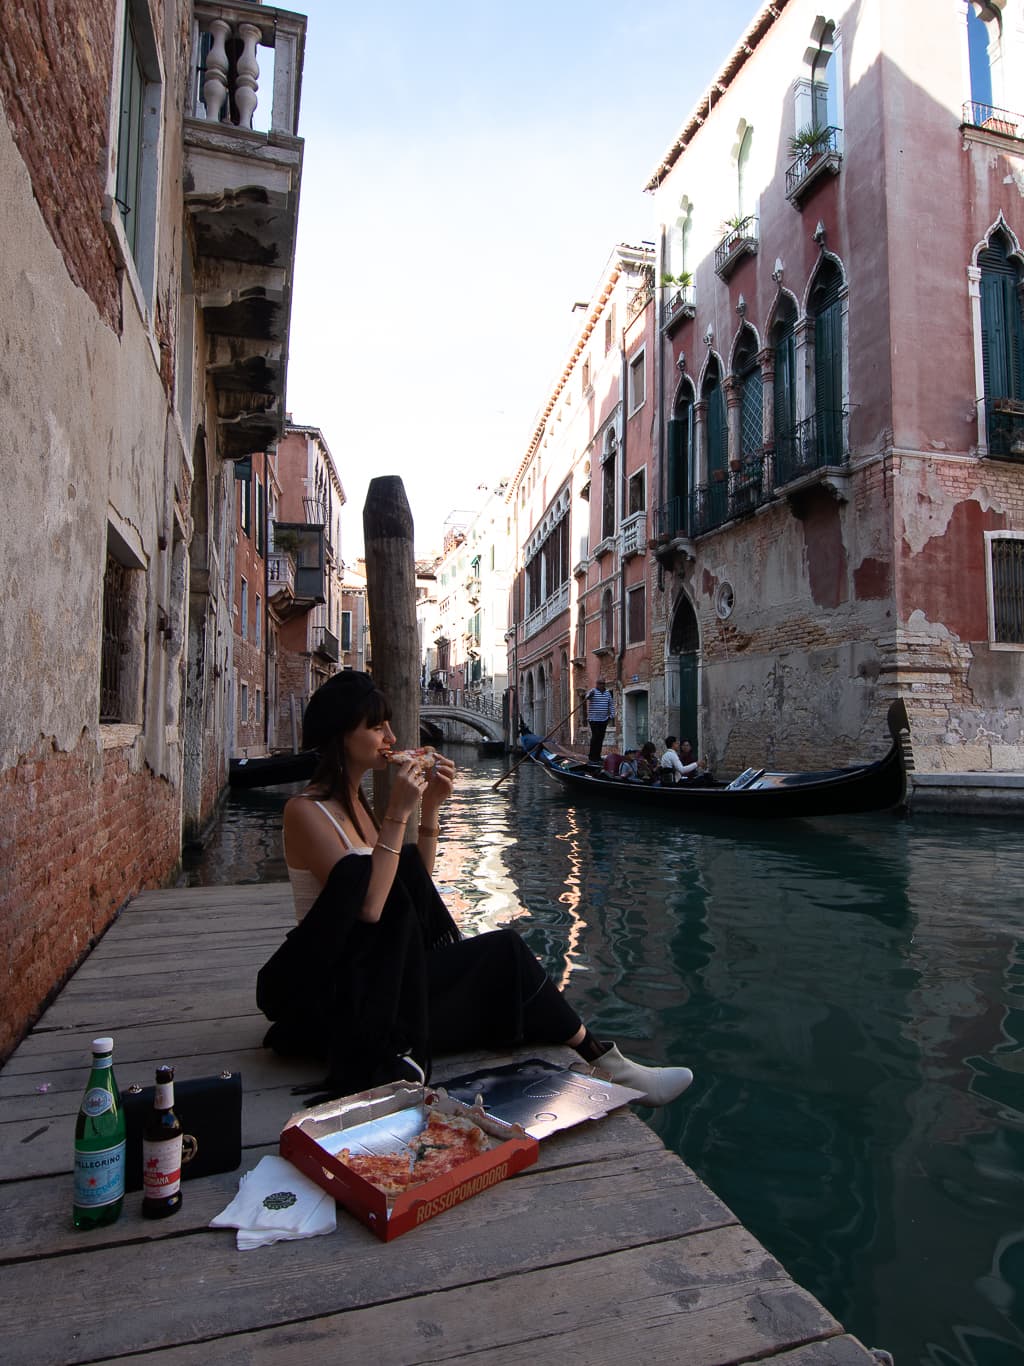
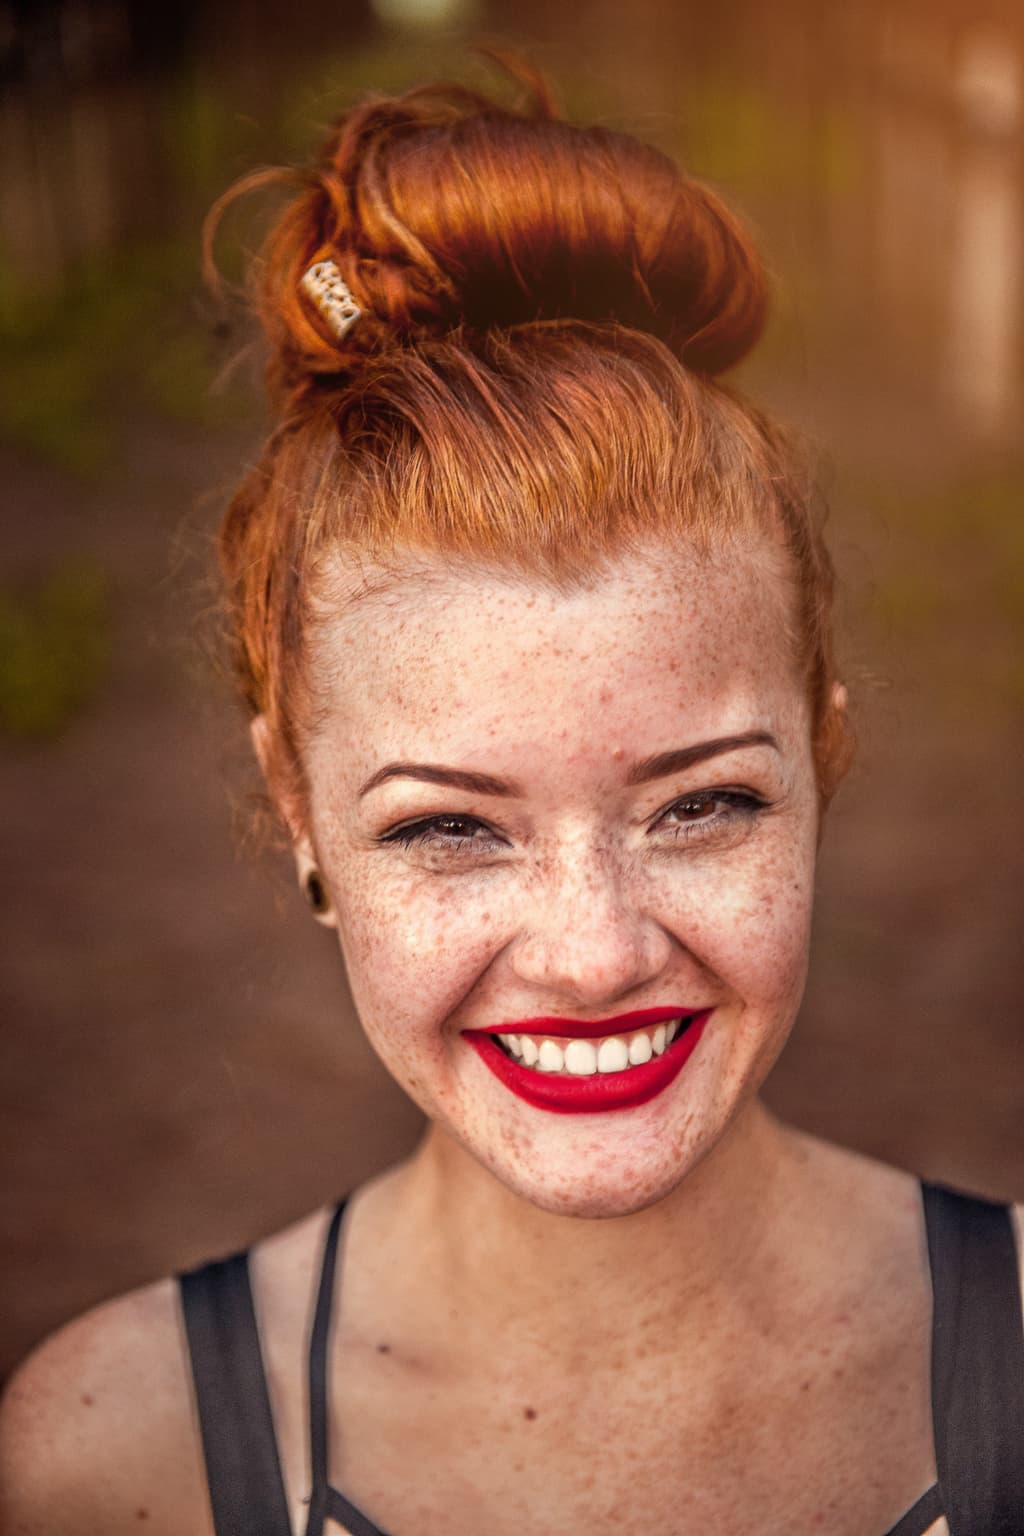 Before
  After
After Removing Undesired Objects
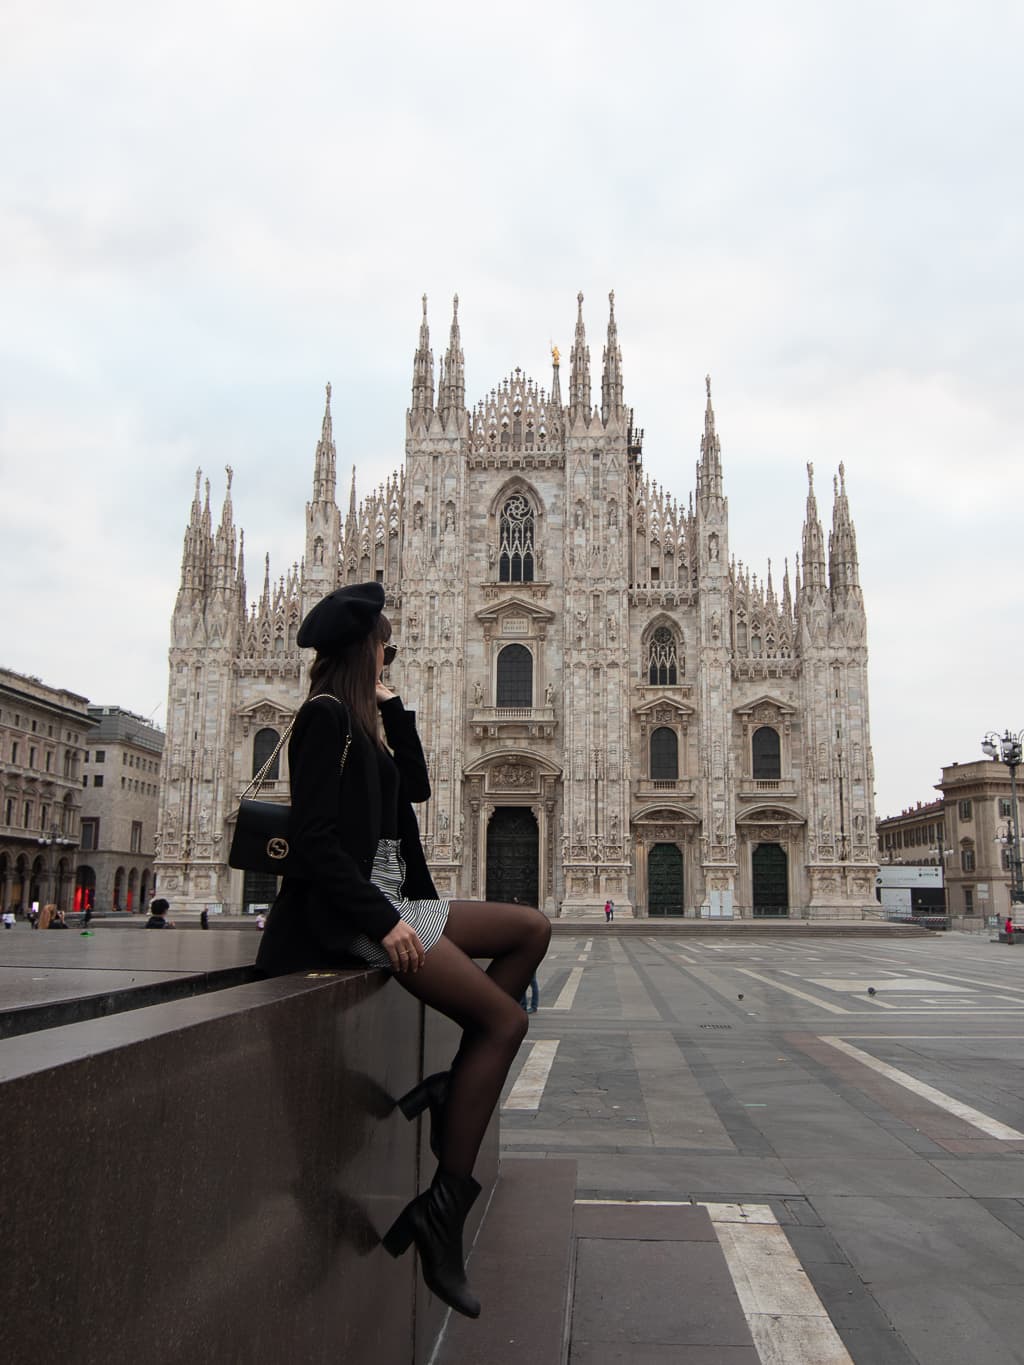
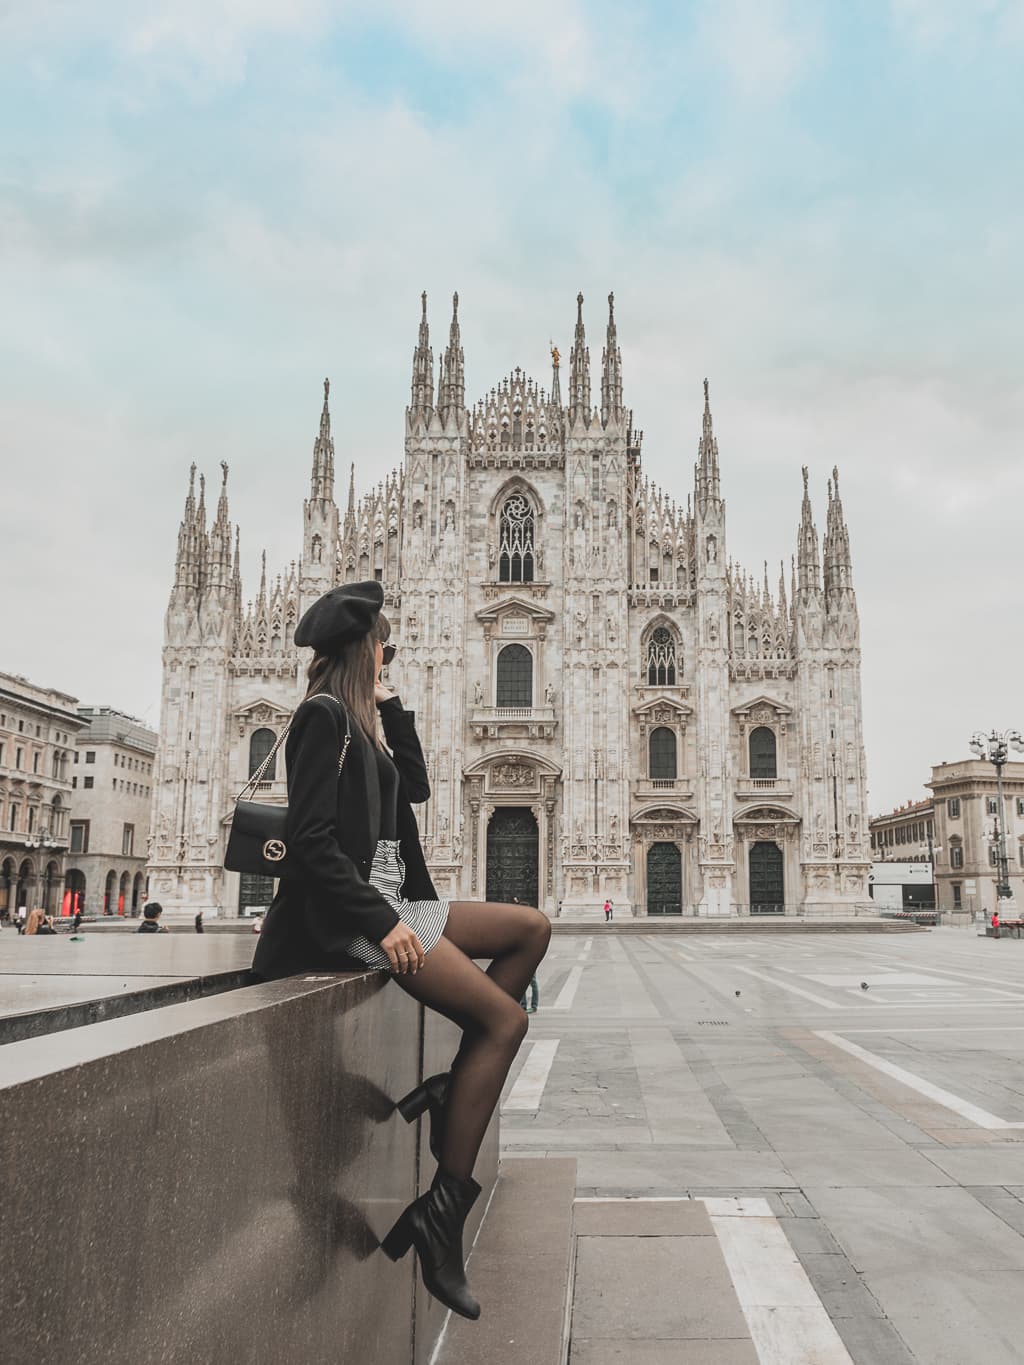
When you take pictures in public places, no matter how hard you try, you’ll almost always find that there is something in the background that kinda kills the whole look. It could be a garbage can or electricity pole you didn’t notice at the time the photo was taken {either that, or you had no way to avoid it}, or could be that someone accidentally stepped into your perfect frame (how could they!😅) Anyway, sometimes this unwanted object that now appears in your background can really ruin a picture’s vibe, and even worse can ruin the composition and distract a viewer from the photo’s main subject.
So how does Lightroom save the day?
Just like in the previous section, the magical tool here is also the stain remover. The quick fix is done by using the clone brush to sample and replicate one specific point, or a larger area.
 Before
 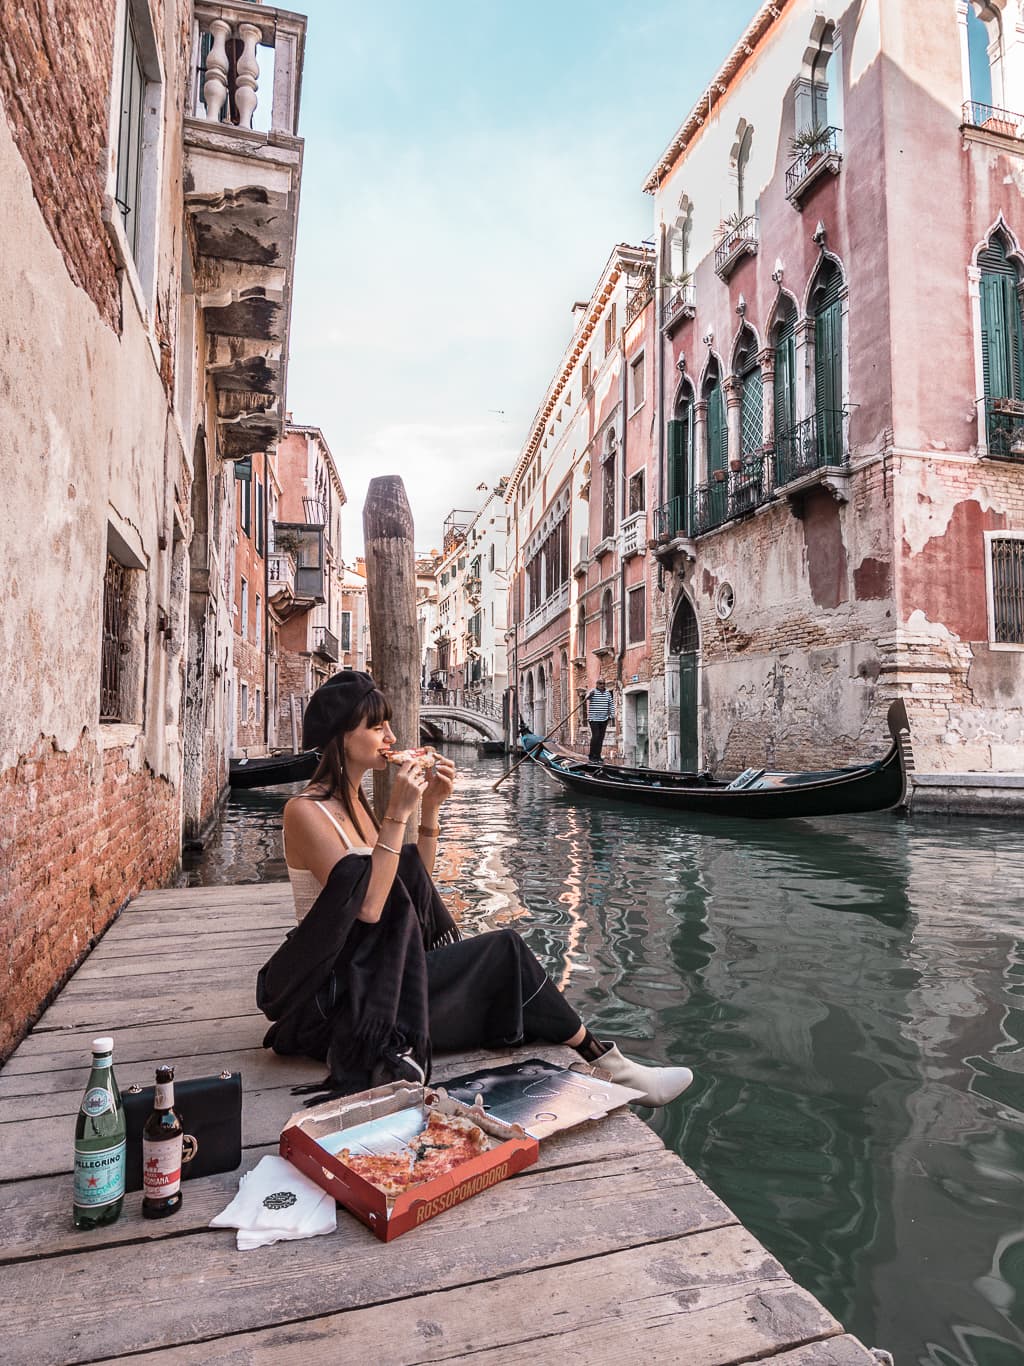 After
After I hope this guide will help you save or upgrade your photos! 🌟
Did you learn something new? Have any more tips to share on “photo saving”? Leave me a comment below!
If you liked this post share it on Facebook and save to Pinterest ♡
P.S. Interested in learning more about photography and professional photo editing? The blogger’s Photobooth is a a photography and editing course where I teach and guide you through my entire process of creating eye-catching visual content. If you want to get more details click here ❤


")

One Response
Hey,
This is a wonderful post. I don’t know the two methods before like you said. This is very difficult to eradicate acne without changing the natural appearance. I’m going to try and let you know!
Thanks & Regards
Aria Mathew