Pinspiration: Nail guides that will make your life much easier
In my first post about nails I confessed that I have 2 left hands and that applying nail polish is quite the difficult task for me.
The simplest solution for me was to give up on the whole manicure-at-home idea and just go for the natural look – short and neat nails without nail polish between one gel manicure to the following one {because even pros admit that you have to let your nails breathe a bit after gel manicures}.
And then Pinterest came into the picture.
Besides all of the mani-pedi inspirations I get there and ask my manicurist to implement, I found a few DIY nail guides that totally made me try it myself!
Don’t worry – I’m not talking about those tedious and complicated guides that will make you curse the second you started trying them.
All of the guides I saved here are totally doable and will save you a lot of money, time and the headache of finding an hour to spend at the beauty salon in your busy schedule.
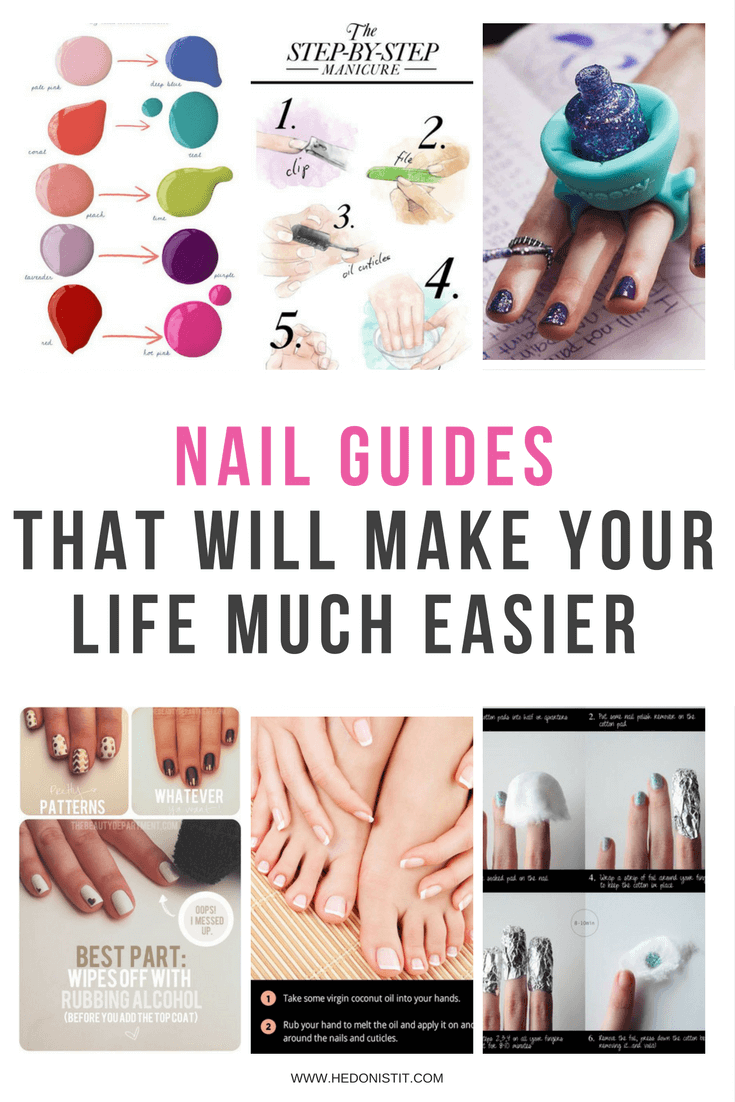
1 – Before anything, it’s important to find the nail shape that suites your hand best {even if you hate filing your nails yourself, at least you’ll know exactly what to ask from your manicurist 😉 }.

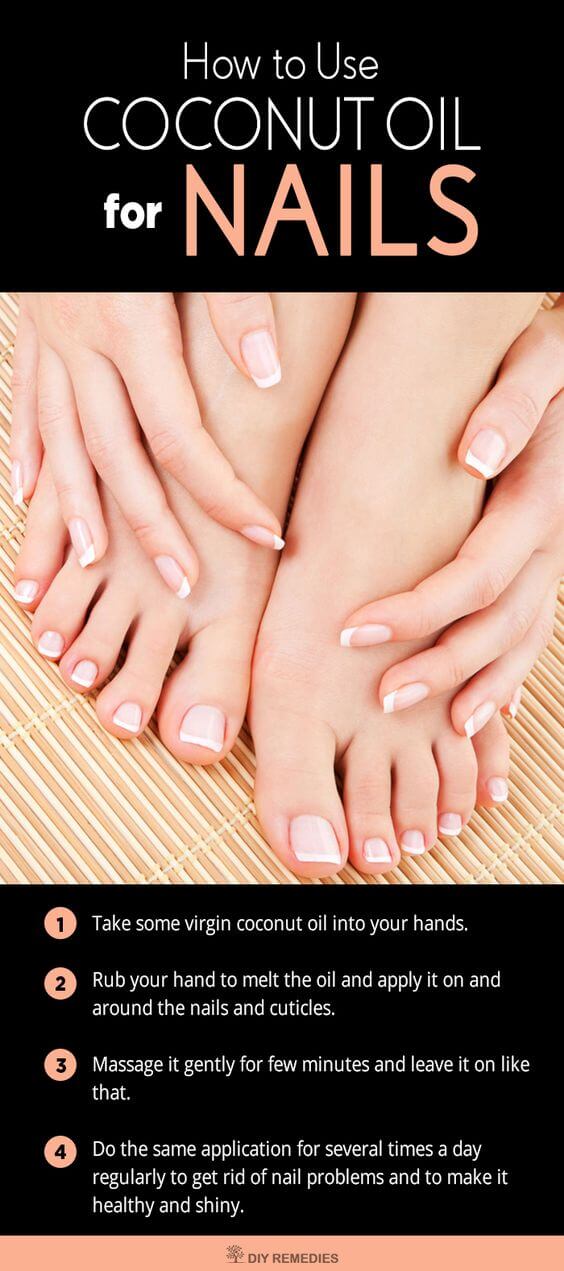
2 – Coconut oil turned into my obsession a long time ago and I use it as a facial and hair mask, body oil, makeup remover and obviously for cooking; so I wasn’t surprised to find out that it could do wonders for your nails, too.
There’s no reason to skip a daily treat like this for your nails which livens them between gel manicures and manages to slow down the annoying cracks of regular polishes.
3 – Clean and manicured nails aren’t only pretty, but are also much healthier.
If you don’t have time to get a professional manicure at the salon, use this guide which explains step by step how to do a manicure at home easily.

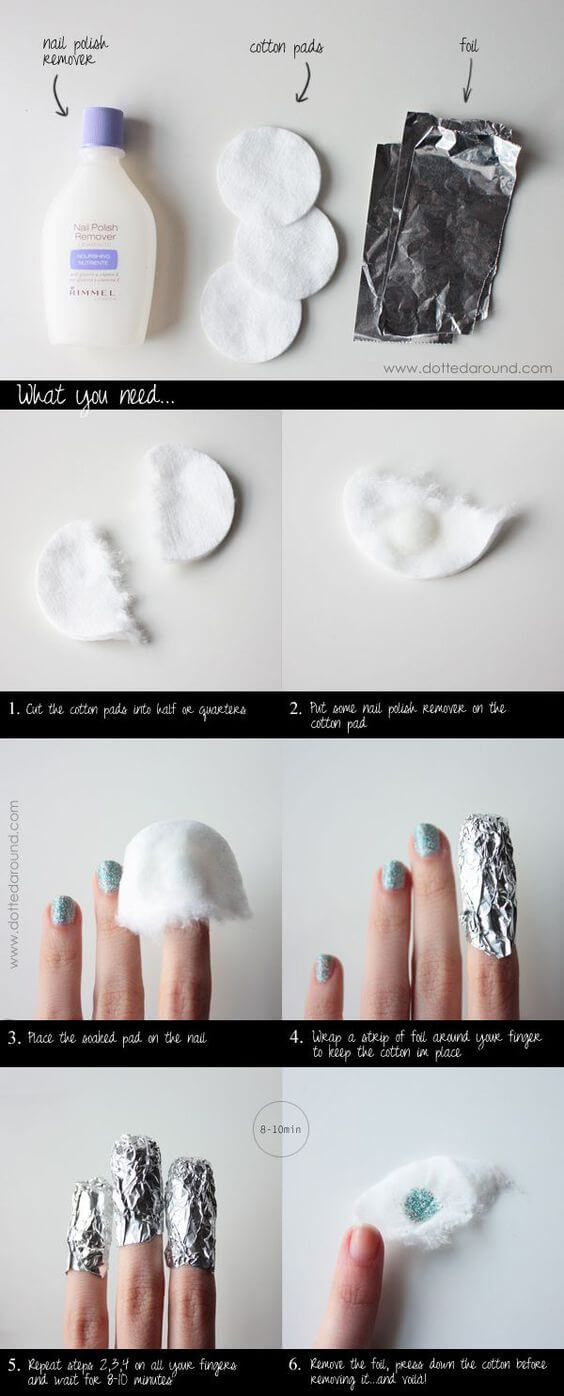
4 – This guide saved me on the last holiday when I was stuck with gel polish that started peeling in the most hideous way and I didn’t have time to get to my manicurist {I mean, it’s the holiday season…}.
I remembered that I saved this guide a little while ago {which is technically for glitter polish but is excellent for gel polish, too} and I simply decided to give it a try.
Not only did it work like magic – it also didn’t hurt at all {unlike the other times I removed gel polish at professional salons}.
A total keeper ?
{For gel polish removal, wait 12 minutes ☺ }.
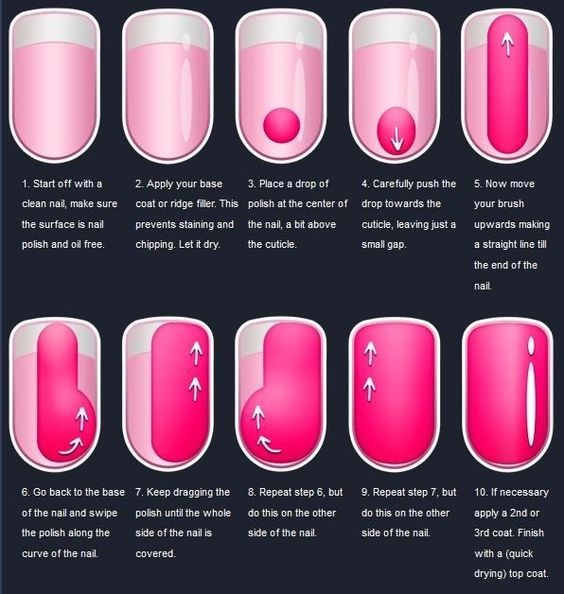
5 – We finally reached the step of applying the nail polish – which is the most complicated part. This guide explains step by step how to do it like a pro.
{I know that it seems quite obvious, but most of us don’t do it the right way ? }
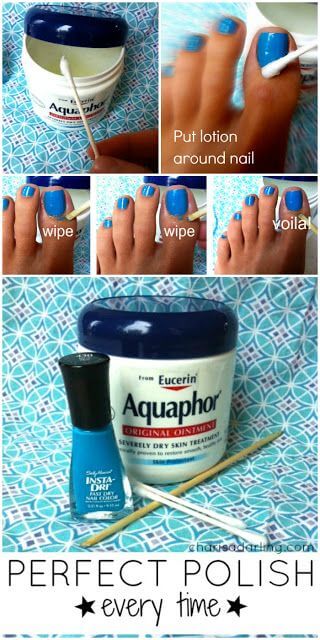
6 – If you can’t stay in the lines and the nail polish gets all over the skin around your nails {like me, but I must admit that I improved}, this guide is exactly for you.
Simply apply some Vaseline on the skin around your nail with a Q-tip and after the polish completely dries, remove the Vaseline – the Vaseline keeps the nail polish from drying on your skin and your manicure / pedicure will look perfect!
7 – And if we’re already talking about applying nail polish – how didn’t they think about this before?!
You can buy it on eBay ? ? ?

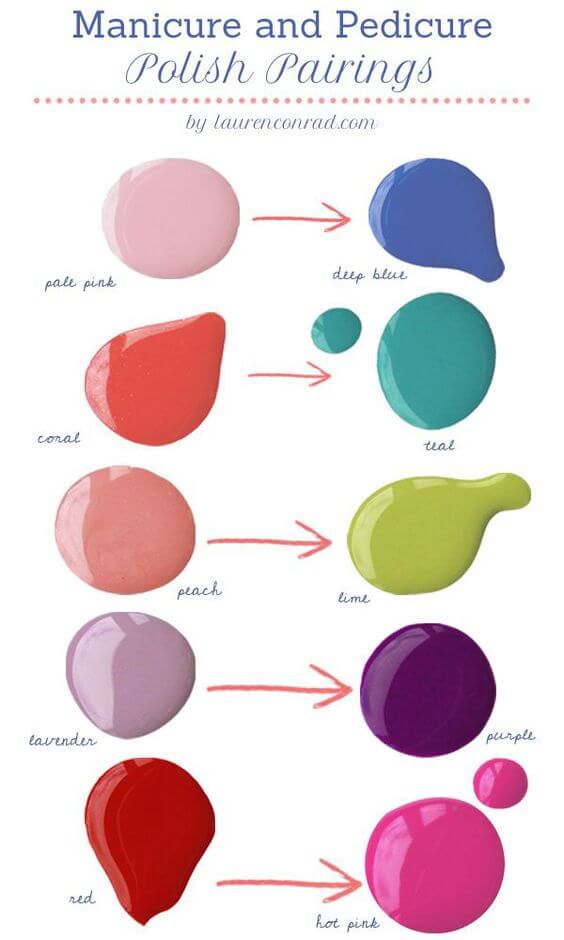
8 – Debating which combos of mani-pedis won’t make you feel like a clown in the circus? Lauren Conrad provided us with some inspiration ☺
9 – Want to add in a touch of the metallic trend on your nails but scared to go all the way with it?
Add to a neutral nail polish, like black, white or nude, a touch of gold/silver with a sharpie pen. It’s easier to draw with it than with regular polish {and you could easily remove it with alcohol!}.

10 – And finally, here’s the perfect guide for velvety nail polish.
{ok, this one requires a bit more effort… but it’s so pretty!!! ? }.

Which of these guides are new to you and you just can’t wait to try? Tell me in the comments! ☺
If you enjoyed this post share it on Facebook and save it on Pinterest! ?





2 Responses
What a lifesaver. I will definitely try that tip about removing gel nail polish.
Yes!! it’s super useful!